-
-
Hm, we're having trouble loading this video.
Try to refresh the page or come back later.
-

-
-
-
-
-
-
-
Price:Rp 10,000
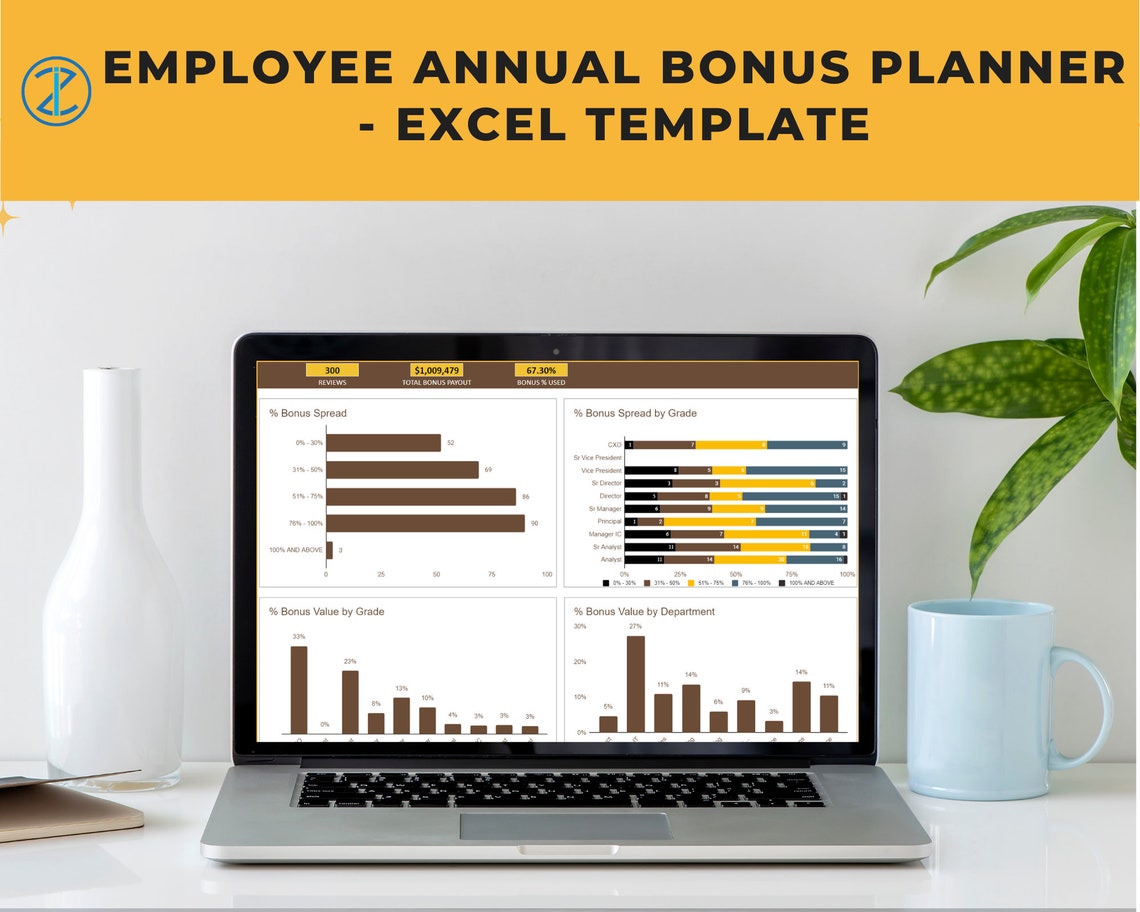
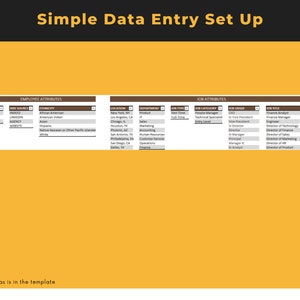
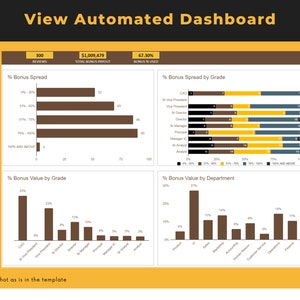
SISTEM4D > PLATFORM GAME ONLINE MODERN AKSES CEPAT
Sistem4D adalah platform game online modern yang menghadirkan beragam pilihan permainan digital dengan sistem yang stabil dan responsif yang dirancang untuk kenyamanan pengguna. Sistem4D dilengkapi fitur lengkap tampilan modern serta navigasi yang mudah dipahami. Platform ini dapat diakses dengan optimal di berbagai perangkat baik desktop maupun mobile sehingga memberikan pengalaman bermain yang lancar, aman & menyenangkan kapan saja.
You can only make an offer when buying a single item
Highlights
SISTEM4D

4.9 out of 5
(3.135 reviews)
All reviews are from verified buyers
Reviews for this shop
Main di SISTEM4D berasa beda sistemnya stabil dan gampang dimainkan.

SISTEM4D jadi pilihan utama saya bisa diakses dari berbagai perangkat tanpa kendala dan gampang dimenangkan sangat layak dicoba.

Tidak perlu coba ke tempat lain SISTEM4D sudah cukup lengkap dan nyaman untuk game online setiap hari.